Two sides of web application. Part 2: sketching

General architecture
The first thing we need to think of is how we'll be gathering the information about users. It's quite easy - we just need to get a request from a visitor. Of any kind - it may be a request to get an image, a file, a stylesheet or a script.
Then we'll just parse headers from that request and save the extracted data in the database. The only problem here is: how to get unique key from each request?. We may use visitor's IP address. It's the easiest way.
Now, let’s decide what pages will our application have and what will they look like:
<div class="col-xs-12 col-md-3">
    <a href="/images/two-sides-of-web-application/part1/screen2.webp">
        <img src="/images/two-sides-of-web-application/part1/screen2.webp" loading="lazy" alt="page 2" class="image-responsive">
    </a>
</div>

<div class="col-xs-12 col-md-3">
    <a href="/images/two-sides-of-web-application/part1/screen3.webp">
        <img src="/images/two-sides-of-web-application/part1/screen3.webp" loading="lazy" alt="page 3" class="image-responsive">
    </a>
</div>

<div class="col-xs-12 col-md-3">
    <a href="/images/two-sides-of-web-application/part1/screen4.webp">
        <img src="/images/two-sides-of-web-application/part1/screen4.webp" loading="lazy" alt="page 4" class="image-responsive">
    </a>
</div>
Templates
Let's create a set of pages, we described above. They will be used later to display real data, but for now we'll stub the real data with constants.
To make our prototyping smooth and fast, we'll use Twitter Bootstrap. We've installed it already with Bower, so we'll be just using it. We need to implement these pages only:
- landing page
- sign up / sign in page
- account settings page
- apps list page
- application page
- application create / edit page
Six pages, huh? Let's do it quick:
src/views/layouts/default.jade:
doctype html
html(lang="en")
    head
        block head
            title ourStats
            link(rel="stylesheet" href="bootstrap/dist/css/bootstrap.css")
            link(rel="stylesheet" href="bootstrap/dist/css/bootstrap-theme.css")
            script(src="bootstrap/dist/js/bootstrap.js")

    body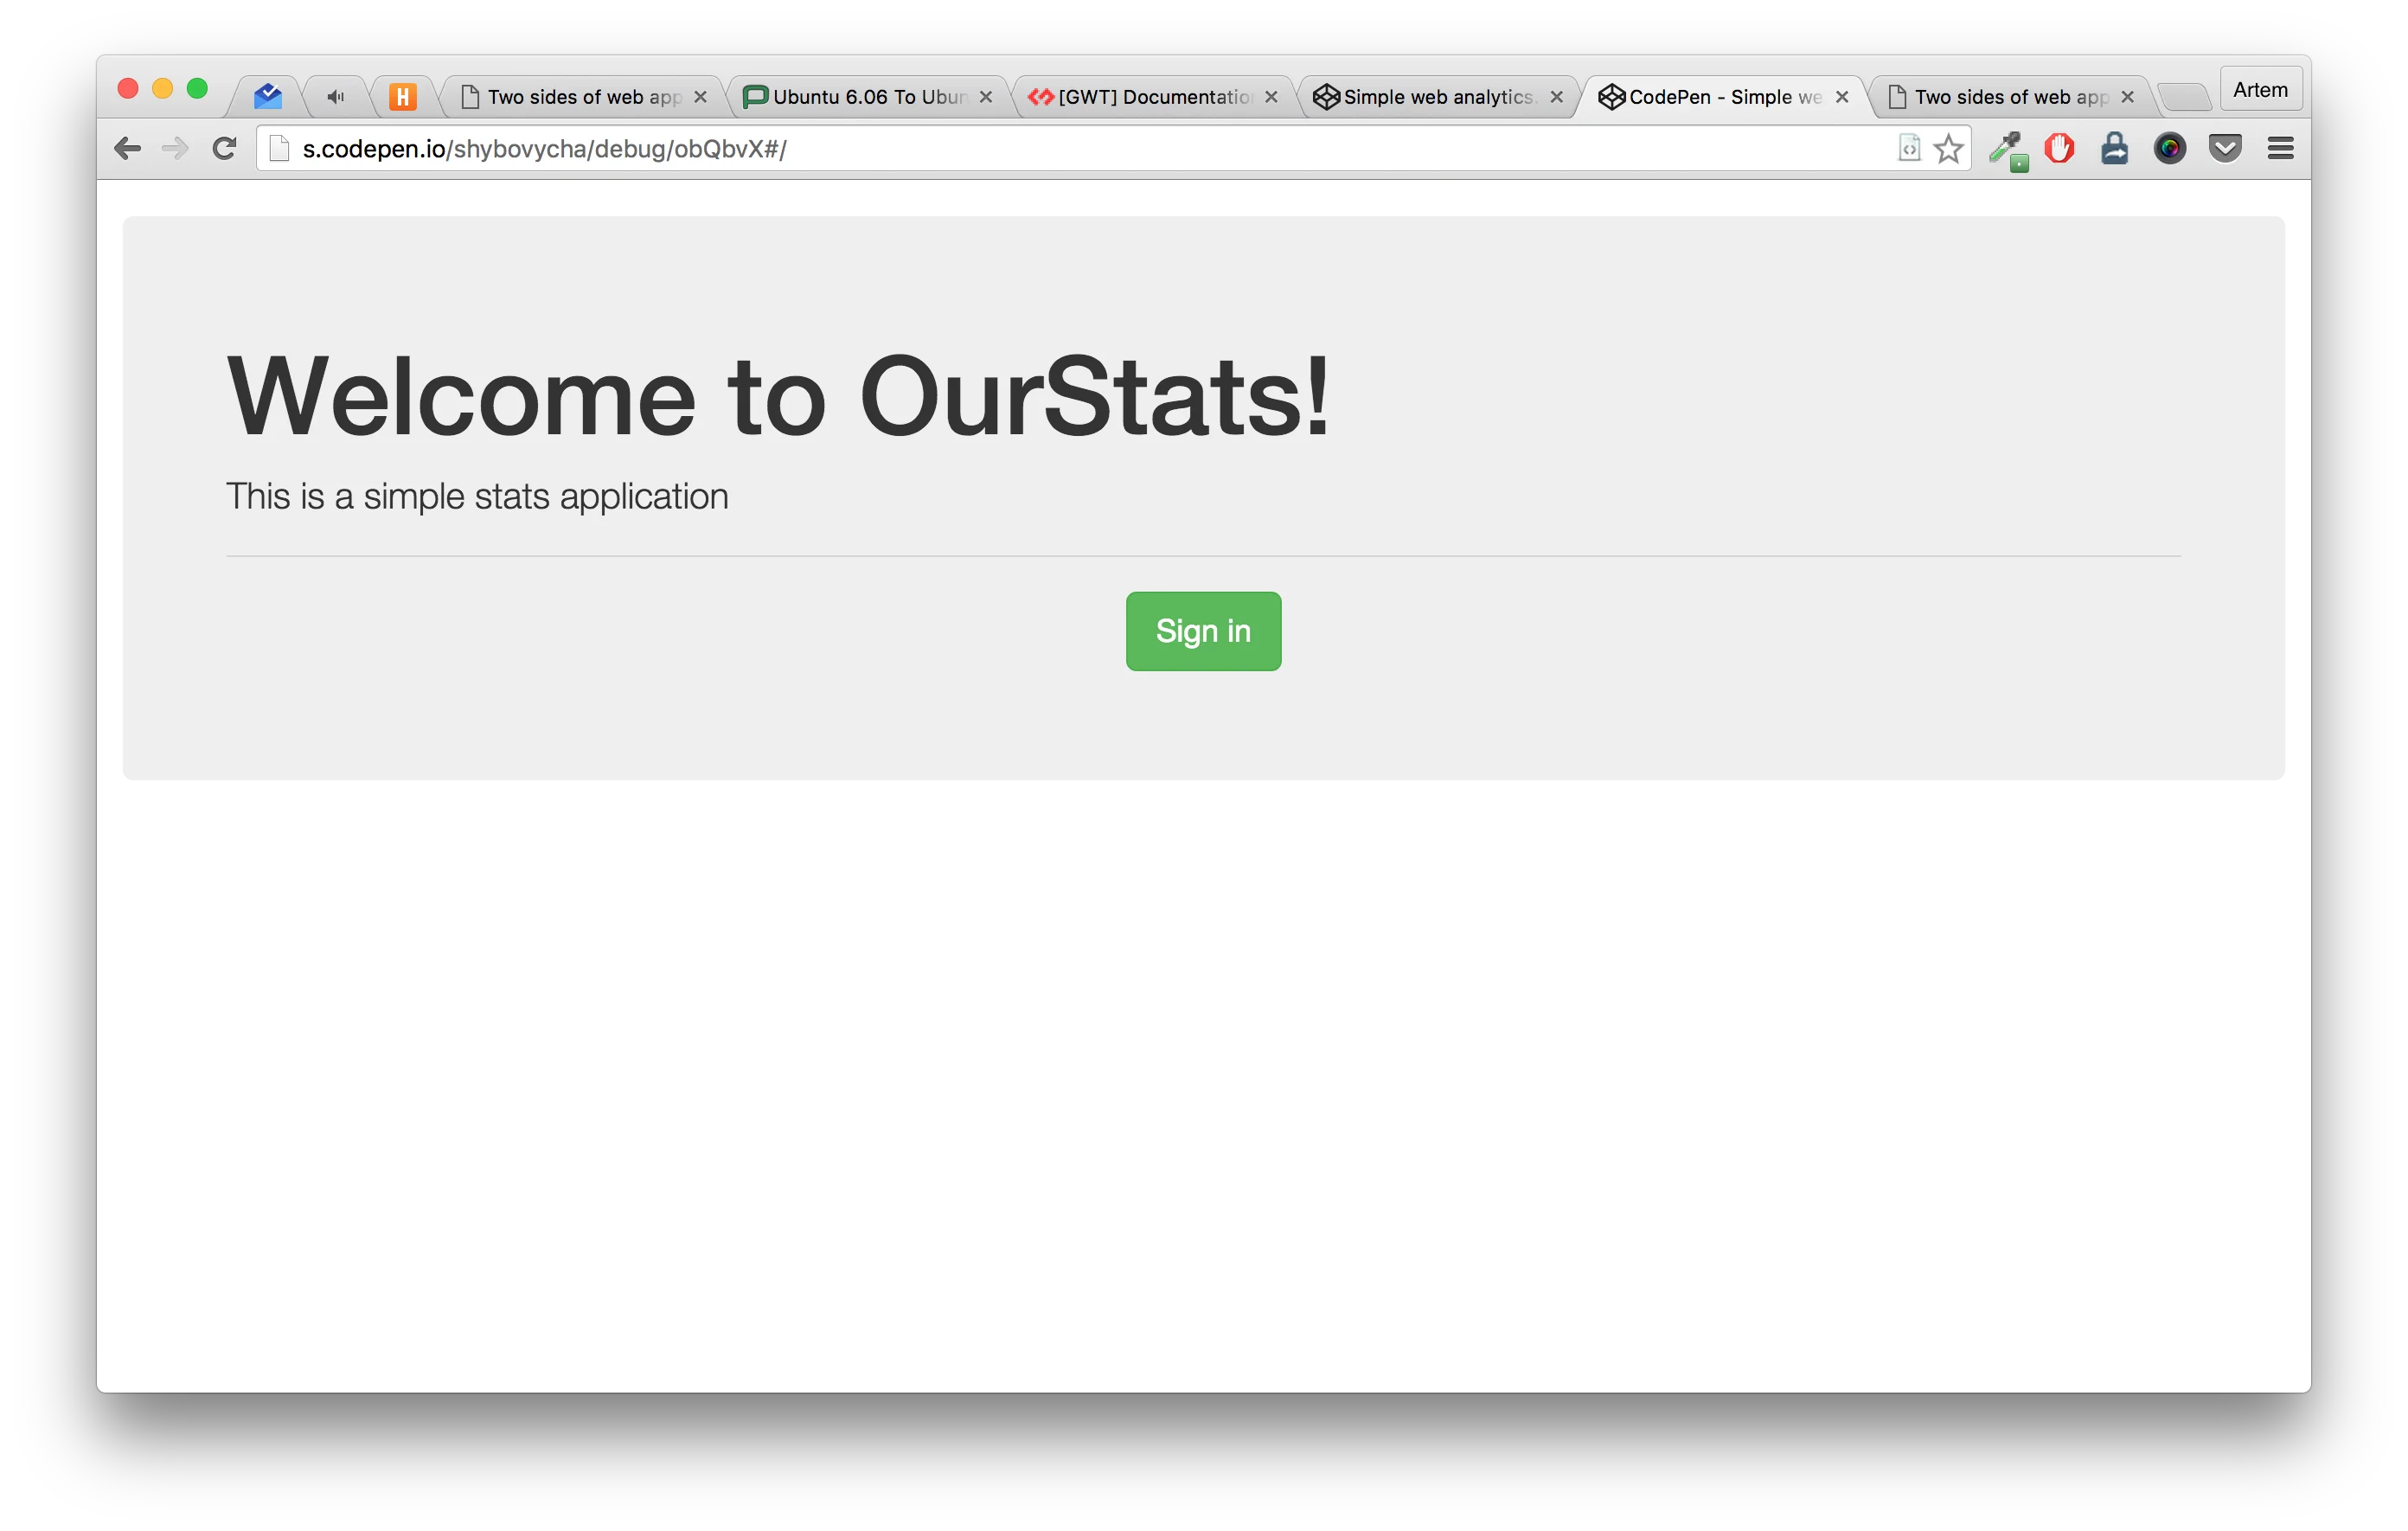
block bodysrc/views/index.jade:
extends layouts/default.jade

block content
    .jumbotron
        h1.display-3 Welcome to ourStats!
        p.lead This is a simple stats application
        hr.m-y-md

        p.lead
            .row
                .col-xs-12.text-center
a.btn.btn-primary.btn-lg(href="#" role="button") Sign insrc/views/new-session.jade:
extends layouts/default.jade

block content
    .row
        .col-xs-12.col-md-4.col-md-offset-1.well
            h3 Sign up
            form
                fieldset.form-group
                    input.form-control(type="text" placeholder="Your name")
                fieldset.form-group
                    input.form-control(type="email" placeholder="Email")
                fieldset.form-group
                    input.form-control(type="password" placeholder="Password")
                fieldset.form-group
                    input.form-control(type="password" placeholder="Password confirmation")
                fieldset.form-group.text-center
                    button.btn.btn-primary(type="submit") Sign up

        .col-md-2

        .col-xs-12.col-md-4.well
            h3 Sign in
            form
                fieldset.form-group
                    input.form-control(type="email" placeholder="Email")
                fieldset.form-group
                    input.form-control(type="password" placeholder="Password")
                fieldset.form-group.text-center
button.btn.btn-success(type="submit") Sign insrc/views/edit_account.jade:
extends layouts/default.jade

block content
    .row.m-t-md
        .col-xs-12.col-md-4
            h3 Account settings
            form
                fieldset.form-group
                    input.form-control(type="text" placeholder="Your name")
                fieldset.form-group
                    input.form-control(type="password" placeholder="Password")
                fieldset.form-group
                    input.form-control(type="password" placeholder="Password confirmation")
                fieldset.form-group.text-center
button.btn.btn-success(type="submit") Savesrc/views/application_list.jade:
extends layouts/default.jade

block content
    .row.m-t-md
        .col-xs-12.col-md-4
            h3 Your applications
            ul
                li
                    a(href="/application_details.html") Test application #1
                li
                    a(href="/application_details.html") Test application #2
                li
                    a(href="/application_details.html") Test application #3
                li
                    a(href="/application_details.html") Test application #4
                li
                    a(href="/application_details.html") Test application #5

        .col-md-offset-2

        .col-xs-12.col-md-6
            h3 Application stats

            h4 New users:
            .progress
progress.progress-bar.progress-bar-success(role="progress" style="width:30%")src/views/application_details.jade:
extends layouts/default.jade

block content
    .row
        .col-xs-12.col-md-6.col-md-offset-6
            form.form-inline
                .form-group
                    input.form-control(type="text" placeholder="From date")
                .form-group
                    input.form-control(type="text" placeholder="To date")
                .form-group
                    .btn.btn-primary Update

    .row
        .col-xs-12
            .well
                | You can track your application visitors with this URL:
                br
                | http://localhost:3000/track/APP1TOKN

    .row.m-t-md
        .col-xs-12
            h3 Visitors
            .well
                | Chart goes here

        .col-xs-12.col-md-6
            h3 Visitors by country

            table.table.table-bordered
                thead
                    tr
                        th Country
                        th Visitors
                tbody
                    tr
                        td USA
                        td 100
                    tr
                        td Germany
                        td 50
                    tr
                        td North Korea
                        td 42
                    tr
                        td Greenland
                        td 39
                    tr
                        td Spain
td 2src/views/edit_application.jade:
extends layouts/default.jade

block content
    .row.m-t-md
        .col-xs-12.col-md-6
            h3 Application settings
            form
                fieldset.form-group
                    input.form-control(type="text" placeholder="Name")
                fieldset.form-group.text-center
                    .btn.btn-danger Reset stats
                fieldset.form-group.text-center
button.btn.btn-success(type="submit") Savesrc/views/new_application.jade:
extends layouts/default.jade

block content
    .row.m-t-md
        .col-xs-12.col-md-6
            h3 New application
            form
                fieldset.form-group
                    input.form-control(type="text" placeholder="Name")
                fieldset.form-group.text-center
                    button.btn.btn-success(type="submit") Create
And to make Bower-managed libraries available in our views, we need to add one more path to the server configuration:
gulp.src(['public/', 'bower_components/'])
    .pipe(server({
        port: 3000,
        livereload: true,
        directoryListing: false,
        open: true
    }));
As you can see, we used Jade's block extending and split our templates into one layout and many partials, so our file tree is clean and changing any of the pages will not be a hard task.
Architecture details
In our frontend application we'll use something called MVVM. That is a design pattern, kindly provided by Angular. So our views will be displaying data and transferring it to controllers (or ViewModels), and all the logic, handling that data will be defined in controllers and services, representing Models. Actually, our models will be handled on a server-side, and services will only provide an interface to them. But that is totally another story and will be described later.
For now let's integrate Angular in our application. And we'll start, deciding how we'll split our application on the Angular layer. Pages we described above are used for these actions:
| Action | Resource (model) |
|---|---|
| sign in | Session |
| sign out | |
| sign up | User |
| edit profile | |
| update profile | |
| add application | Application |
| edit application | |
| update application | |
| remove application | |
| show application | |
| track visitor | Visitor |
And so we can define corresponding Angular controllers:
| Url | Controller |
|---|---|
| / | LandingPage |
| /new-session | Session |
| /applications | ListApplications |
| /applications/new | NewApplication |
| /applications/:id | ShowApplication |
| /applications/:id/edit | EditApplication |
| /edit-account | EditAccount |
Angular
Angular.js is a framework by Google for making SPAs (Single-Page Application). SPA is a great architecture, where you have a thin backend server, providing an API to your slim frontend application. And the most interesting part here, is that you have all your application' pages in a one place, loaded once. And they are switched by a router in a user's web-browser. So all the communication with server is stripped to data manipulation requests (creation, updating and reading data from server) and first-time request, sending the HTML, CSS and JavaScripts to user's browser. And then, all the interactions are performed in a browser. At maximum, frontend application can request a partial or some assets (like images) from a web-server.
Basically, here's how SPA works:
- user enters a website
- server sends application' code (implemented in JavaScript) and HTML to user
- user, say, clicks on a link to change the page
- if application needs partial, it requests server for a HTML partial
- application renders a retrieved (or cached) partial in a browser
Let's start and you will see how easy it is!
Kickstarting
We'll start, adding Angular to our bower.json dependencies:
bower install --save angularNow when we have Angular inside the bower_components directory, let's add its references to
our layout:
head
    script(src="angular/angular.js")
Now, the only two things we need to start using Angular right away are:
- Angular application, defined in the JavaScript and referenced in the
<html>tag withng-appdirective - Angular controller, which will contain scope with variables and functions for the page' portion
Yeah, we definitely need some clarifications about those two new words.
Theory bits
Angular defines a few kind of bricks, you may use to build an entire application:
- templates - dynamically changed HTML files
- two-way data binding, used mostly within interpolations - a mechanism for sharing dynamically changed (by either user of javascript) data between views and code
- controllers, holding scope - are JavaScript objects, containing variables and functions to be used in templates (functions and variables are put inside a scope, which is an argument to corresponding controller; I'll describe it later)
- factories (or services) - helper objects, containing logic which is not directly related to views (displaying and retrieving data)
- directive - is a place, where HTML-related code is placed
On the other hand, in MVVM architecture we have three layers:
- Model - layer, performing manipulations on data; kind of database layer
- View - user interface layer
- ViewModel - stores data to be shown on UI or which was retrieved from UI
Accordingly to this scheme, in Angular we have the next logic structure:
- Model - Services
- Views - Templates, Directives
- ViewModel - Controllers
Here I did not mention two-way data binding and scopes, because first one is a part of templates and the second one is a part of controllers. And they may not be separated one from another.
Kickstarting. For real
Let's add some Angular logic into our project. We'll split our app into all those
controllers and services very soon. But first, we need our application in Angular to be
registered. Create a file config.js inside the src/javascripts/ directory
with the following content:
var ourStatsApp = angular.module('ourStatsApp', [ ]);And point the whole layout to use that application with the ng-app directive on <html> tag:
doctype html
html(lang="en" ng-app="ourStatsApp")
    head
        block head
Now when we have our app accessible by all our pages, let's create our first controller,
which will handle exactly one page, the landing page. To expose our controllers,
we need to make a module, consisting of controllers and add it as a dependency
to our application. If you take a look at the application definition, it is also
a module. The first parameter to angular.module() function is a module name,
the second one is a list of dependencies.
Controllers are defined in a same way, but the dependency list for them contains
module definition as the last element as well. Let's define a LandingPageCtrl controller
in a src/javascripts/controllers.js file:
var ourStatsControllers = angular.module('ourStatsControllers', []);

ourStatsControllers.controller('LandingPageCtrl', [ '$scope',
    function ($scope) {
        $scope.apps = 142;
    }
]);
Here we defined a module ourStatsControllers, which will contain all the controllers
and a LandingPageCtrl controller, which is a module of the same name, with a single
dependency - $scope and its implementation. As you can see, the $scope appears
here twice - first time as a dependency name and second time as an argument
to controller' definition function. That's exactly how dependency injection is made
with Angular. Here we defined a scope variable for our controller too, called apps.
We'll use it in just a moment.
Note the second argument: it's not required to be a list with dependencies' names first and controller implementation function, taking all those dependencies as arguments last. This is done only for the sake of minification. That's it, if you decide to minify your javascript files, you'll get a lot of errors if you will not specify dependencies' names as first list items, because most of javascript minifiers shorten your variables' names to just a few symbols, while keeping strings all the same. So if you are not minifying your javascript files, this code will work perfectly:
ourStatsControllers.controller('LandingPageCtrl', function ($scope) { ... })Instead, when minified, this controller will be transformed into something like this:
a.controller('LandingPageCtrl',function(b){...})And Angular will try to find a controller, factory or a service, named b. And will probably fail.
But if you use "explicit" dependency injection, like this:
ourStatsControllers.controller('LandingPageCtrl', [ '$scope', function ($scope) { ... } ])then this code will be minified to something like this:
a.controller('LandingPageCtrl',['$scope',function(b){...}])And then Angular will try to inject the $scope service and will succeed.
Just keep this small trick in mind, when developing a real-world Angular applications.
Now we need to inject our controllers module into our application. So we just add a dependency entry inside our application declaration:
var ourStatsApp = angular.module('ourStatsApp', [ 'ourStatsControllers' ]);As we already defined the ourStatsControllers module, we don't need to provide
an implementation for it.
But to make our controller work properly, we need either to declare it on frontend, making it handle static piece of a page, or make our application use different controller and view, depending on a route in a browser's address line.
The first approach is good when you use Angular for complex widgets on a page. But we need something more from our application, so we'll set up router. It'll parse URL from browser and run the corresponding controller.
Router we'll be using is ngRoute. This is a third-party plugin for Angular.
And in order to use it, we need to add a Bower dependency to our project:
bower install --save-dev angular-routeNow we only need to reference it in our app definition:
var ourStatsApp = angular.module('ourStatsApp', [ 'ngRoute', 'ourStatsControllers' ]);The next step is configuring our application routes, making application to "understand", which controller and which template it should run. This may be done in the same file, as the application definition:
ourStatsApp.config([ '$routeProvider',
    function ($routeProvider) {
        $routeProvider.
            when('/home', {
                templateUrl: 'partials/landing-page.html',
                controller: 'LandingPageCtrl'
            }).
            otherwise({
                redirectTo: '/home'
            });
    }
]);
This configuration makes our application run LandingPageCtrl when the /home page is
entered. And if the URL entered is not known, application will redirect user to the
/home page. All Angular routes are passed as an anchor, so saying the /home page
we actually mean http://your.host/#/home. This makes browser not send requests
to the server, requesting non-existent pages.
Also, note we point our application to use the partials/home.html template.
But we did not tell the Angular where to render it. To fix that, we'll
add a ng-view directive to the .container-fluid element of our <body> tag,
right in our layout:
body
    block body
        .container-fluid(ng-view)
Currently, when the project is built with the Gulp' build task,
we have a public/home.html page, but it is not a partial - it is a standalone
page, extending the layout. But what we need is to compile all our Jade templates
into a public/partials directory, making them available through the
/partials/partial_name.html URL. And they should not extend the layout, because
then we'll end up with an incorrect HTML code.
To make the magic happen, we only need to change our build task for Gulp
to build views directly to the public directory. So the src/views/index.jade
file will be the main HTML page of our application, available through
/index.html URL. And all the partials would be our Angular controllers' templates,
available through /partials/template_name.html URLs.
Now the views part of Gulp build task should look like this:
gulp.src('src/views/**/*.jade')
    .pipe(jade())
    .pipe(gulp.dest('public/'));
And let's just extract the content of index.jade partial as it is now, all the
content into a separate Angular partial, src/views/partials/home.jade.
And let's add only one small change - add only one line there:
<h1>Currently running {{ apps }} apps</h1>Remember, we have the $scope parameter for our LandingPageCtrl controller?
And that there we set the apps variable? That is it, displaying on our home page.
All the other parameters, added to the $scope are available on the corresponding
template, by default. You may display them with some formatting, looping through the list
with ng-repeat and using them as conditionals with ng-if or ng-show.
But let's go step-by-step.
Populating our app with stuff
For now, let's add all the other controllers to our app. Just create empty controllers according to the table from part one, using the same approach as described right above.
We'll define each controller in its own file, but all of them will be concatenated
into one big application javacript file. We'll use Gulp for this purpose with
its gulp-concat plugin.
Let's install it:
npm install --save gulp-concatIts usage is super-easy: you just redirect the output of our CSS and JS files compiler
to the concat(filename) function, providing it with a resulting filename. Like this:
var concat = require('gulp-concat');

gulp.src('src/javascripts/**/*.js')
    .pipe(babel())
    .pipe(concat('all.js'))
    .pipe(gulp.dest('public/javascripts'));

gulp.src('src/stylesheets/**/*.scss')
    .pipe(sass({ style: 'expanded' }))
    .pipe(concat('all.css'))
    .pipe(gulp.dest('public/stylesheets'));
Now, the controllers. First we need to set the routes. The router configuration for our application will look just like this:
$routeProvider
    .when('/', {
        templateUrl: 'landing-page.html',
        controller: 'LandingPageCtrl'
    })
    .when('/new-session', {
        templateUrl: 'new-session.html',
        controller: 'NewSessionCtrl'
    })
    .when('/edit-account', {
        templateUrl: 'edit-account.html',
        controller: 'EditAccountCtrl'
    })
    .when('/applications/:id', {
        templateUrl: 'show-application.html',
        controller: 'ShowApplicationCtrl'
    })
    .when('/applications', {
        templateUrl: 'list-applications.html',
        controller: 'ListApplicationsCtrl'
    })
    .when('/applications/:id/edit', {
        templateUrl: 'edit-application.html',
        controller: 'EditApplicationCtrl'
    })
    .when('/applications/new', {
        templateUrl: 'new-application.html',
        controller: 'NewApplicationCtrl'
    })
    .otherwise({
        redirectTo: '/'
    });
And we currently have a lot of pages with broken links. We should fix that, providing URLs to our (empty for now) controllers. Like this one:
a.btn.btn-primary.btn-lg(href="#/sign-in" role="button") Sign inFix those links for all the views by yourself - that is not a complex task. All the routes are described both in the app configuration and in a table above.
Demo
See the Pen Simple web analytics. Angular injection. v1 by Artem Shoobovych (@shybovycha) on CodePen.